DataPortal Sync
Overview
The DataPortal Sync module (formerly known as Table To Form Automapper) allows mass creation, modification, and deletion of data in a Composable DataPortal. It takes a Composable Table and converts each row into a "Container" in the DataPortal, either creating a new container or updating the values in an existing container.
The basic behavior of DataPortal Sync is best demonstrated via an example. See below for a complete discussion of inputs and options.
Example DataFlow
The following example DataFlow demonstrates many of the possible ways to use the DataPortal Sync module. This DataFlow uses the Insurance Application sample DataPortal model, which creates a DataPortal called AppManagement by default. WARNING: this DataFlow deletes all existing data in the DataPortal, so only run it against a test DataPortal. You can change the name in the Excel file if you already have an AppManagement DataPortal, just be sure to select the right DataPortal when configuring the DataFlow.
Create New Containers
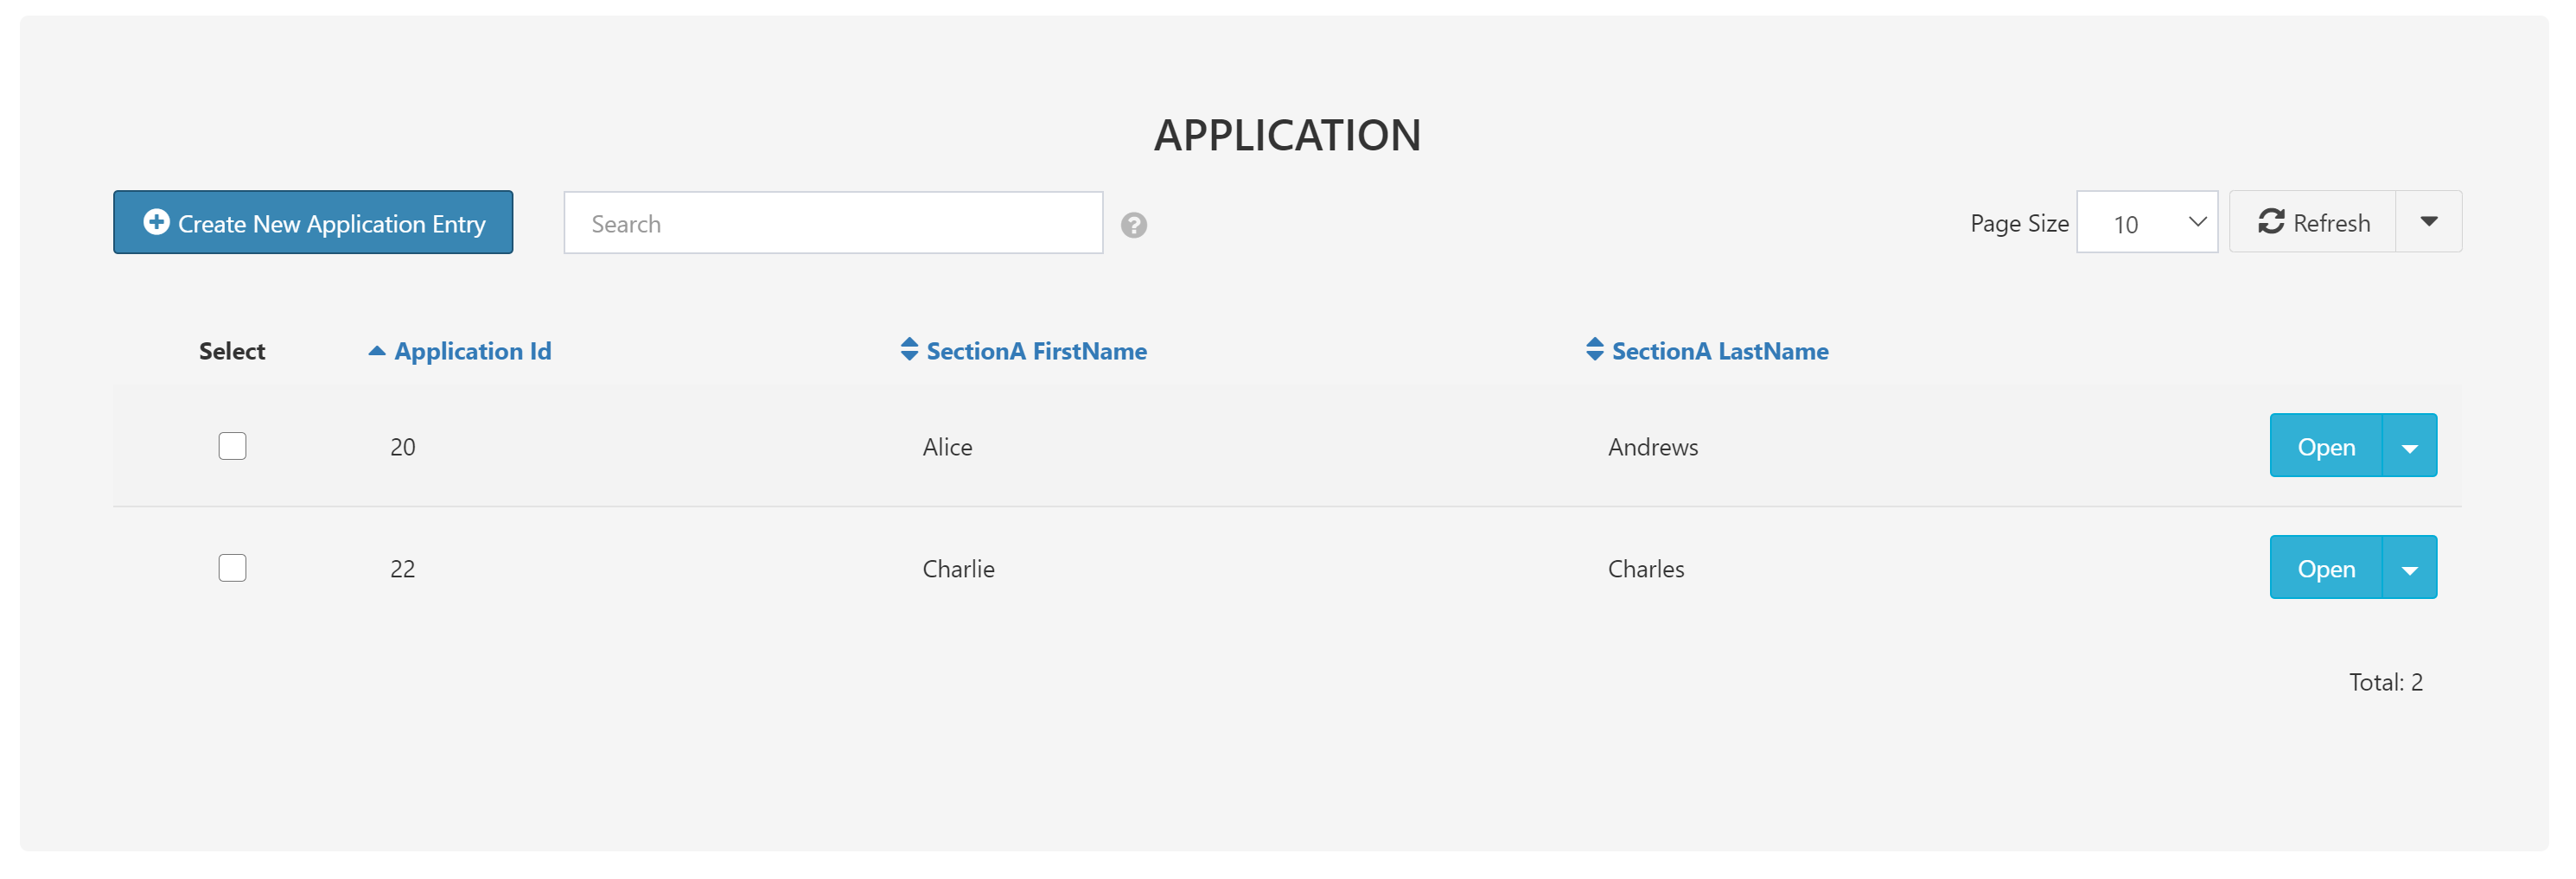
The simplest way to use DataPortal Sync is to create new entries in a DataPortal Table. In the AppManagement DataPortal, the first page we see is a table of Applications. Each of these is a DataPortal "Container" with type Application, defined in the DataPortal model. Each container encompasses many fields, which may be spread across multiple tables in the underlying database by use of the Page control type.
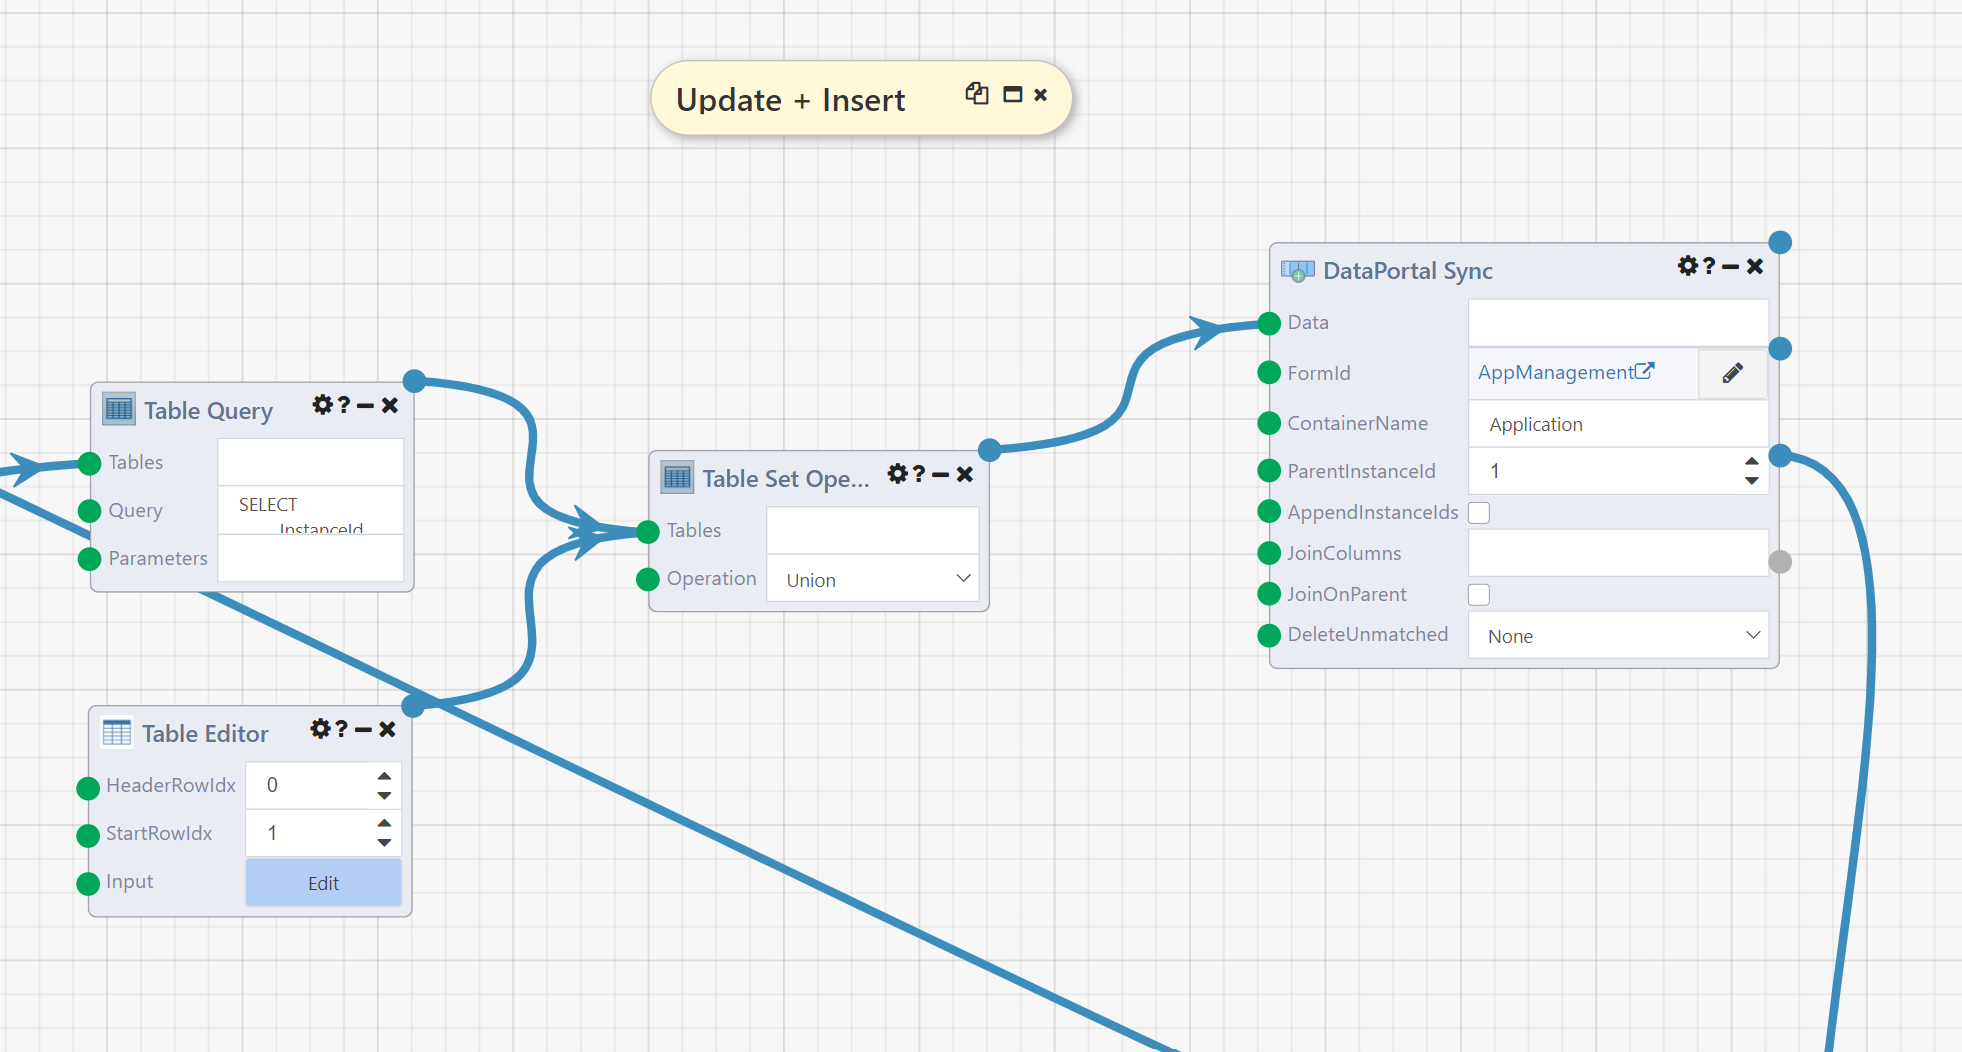
The first DataPortal Sync module in our DataFlow will create three new Applications from a Composable Table (here created in a TableEditor module). Each of the created containers will be populated with the values from the table.
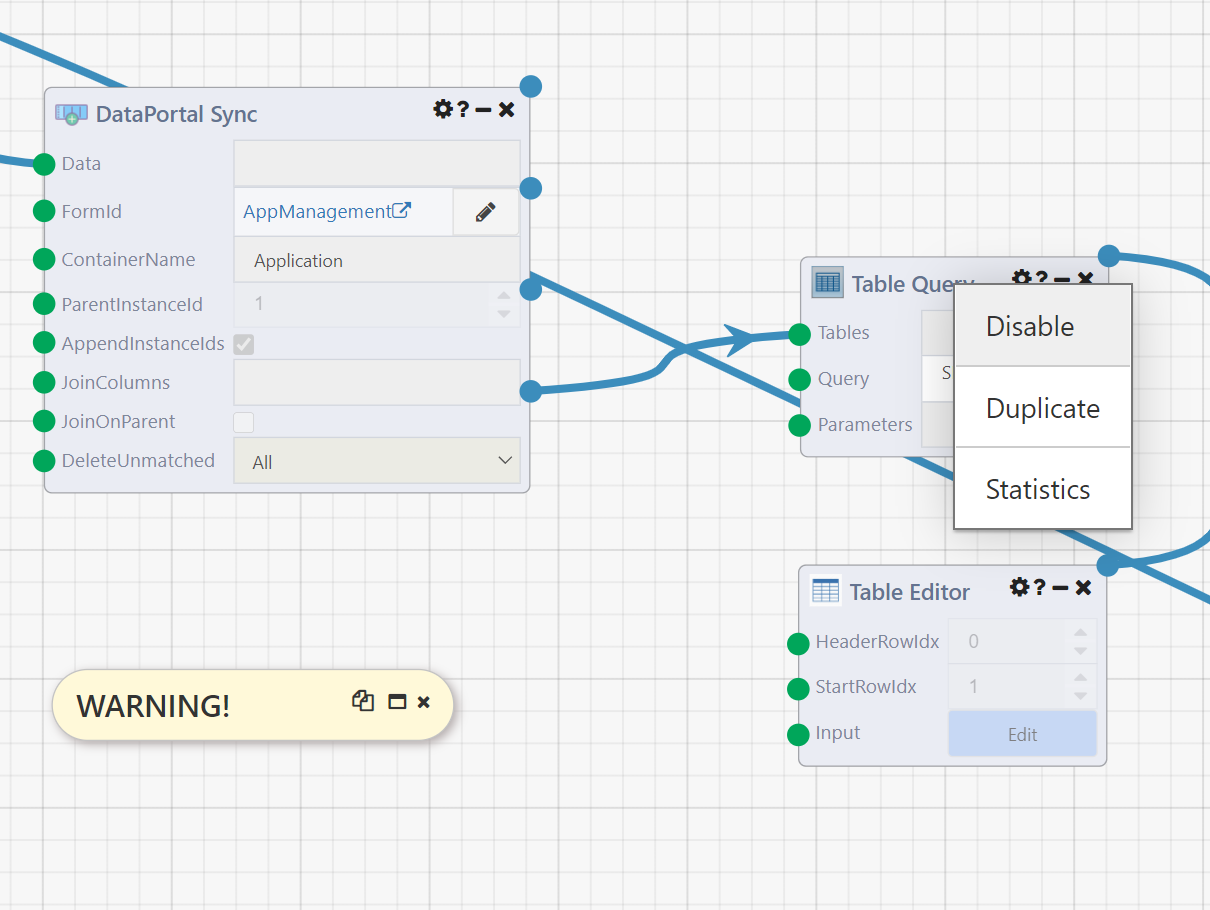
To see how this module works, disable the Table Query module that follows it by right clicking and selecting "Disable":
This will allow you to run just first DataPortal Sync, which is being used to create new containers. Click Run to see the results. You can look at the output values and Trace log on the DataFlow for some information, but the best way to see the work the module did will be to go to the AppManagement DataPortal. There you will see three rows in the Application table, each with a FirstName and LastName showing on the table. If you navigate in to one of those Applications, you'll see that various values are filled out on the Application, Proposed Insured, and Policy Owner tabs.
Module Inputs
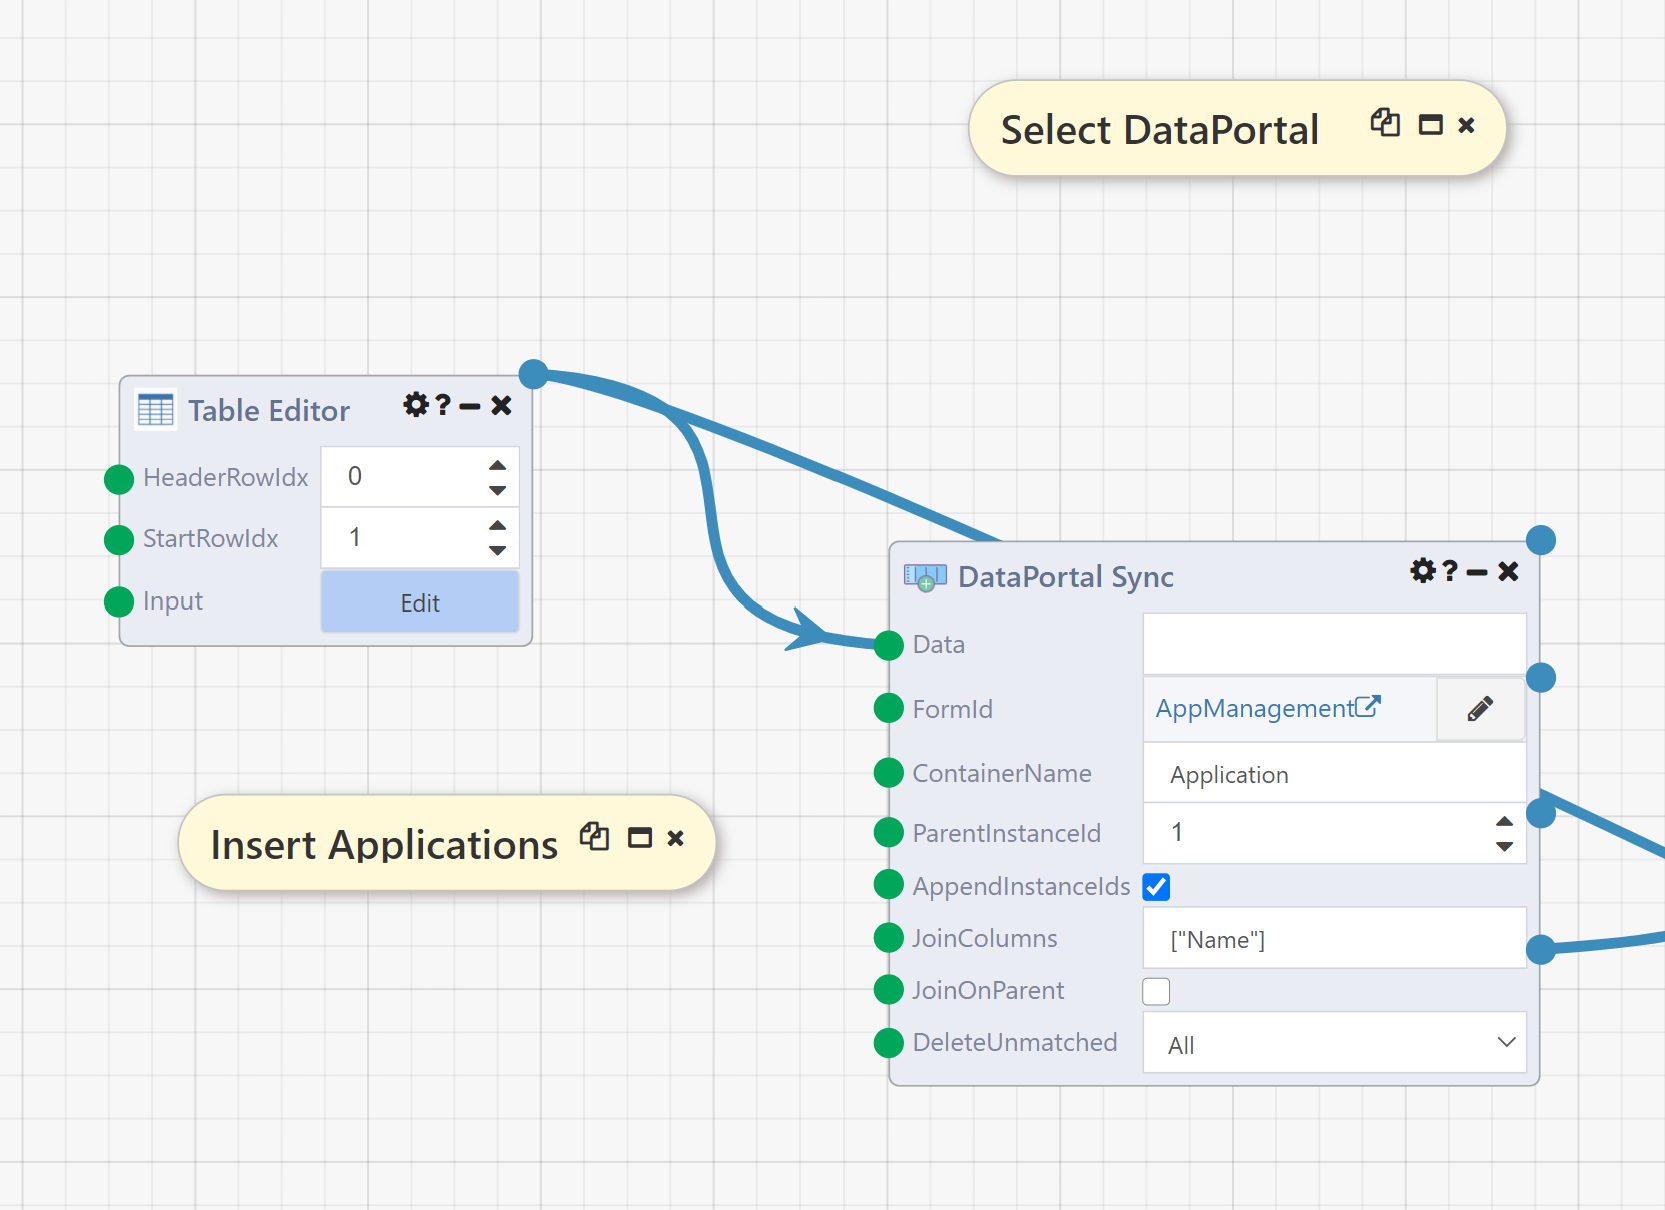
To see how these entries were generated, return to the DataFlow and examine the first DataPortal Sync module. Notice that seven inputs are set; for the most basic implementation of creating new containers, the first 4 of these are required:
- Data: This is the table defining the containers to be created, and will be discussed in more detail below.
- FormId: This defines which DataPortal to work with; here we have clicked the pencil icon and selected the
AppManagementDataPortal from the window that appeared.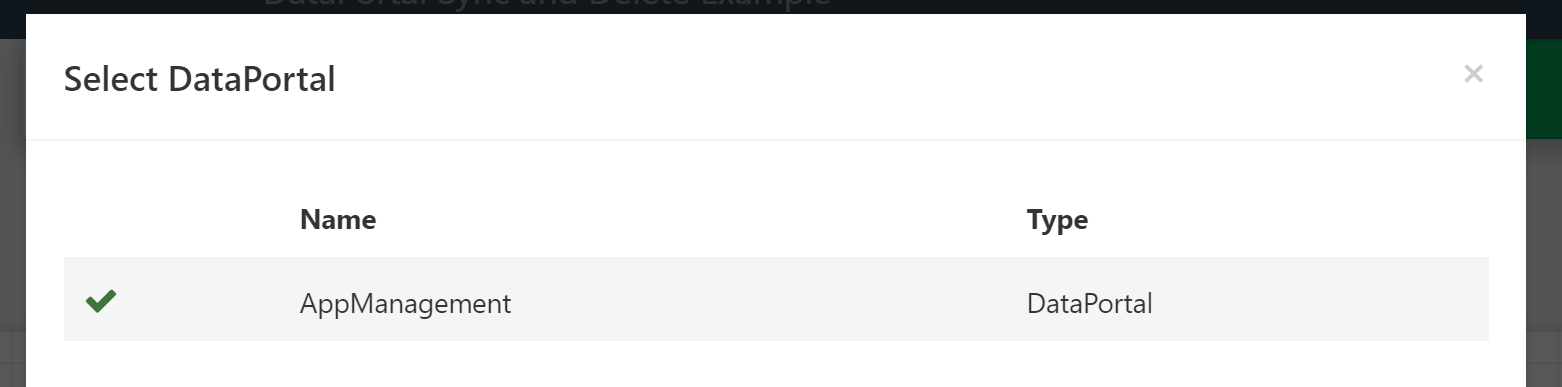
- ContainerName: This is the name of the container to be created, as defined in the Excel model.
- ParentInstanceId: The ID of the container into which new containers should be inserted. For
Applicationthis is always1becauseApplicationis at the top level of the DataPortal. More complex behavior will be demonstrated later in the DataFlow.
The following two inputs are set to non-default values only to facilitate further demonstrations later in this DataFlow:
- AppendInstanceIds: This is checked so the Table output will be set; this output will be used and discussed downstream.
- JoinColumns: This is set to
["Name"], so if you run this DataFlow more than once it will update the containers created on the first run rather than creating new ones again. This makes it easier to see the changes in the DataPortal values by running portions of the DataFlow. Details on usage of this column are below. - DeleteUnmatched: This is set to
All, to clear the DataPortal before proceeding with the remainder of the DataFlow, deleting any previously existingApplicationcontainers. This setting is required to allow the DataFlow to be run repeatedly and stopped at various points for demonstration purposes. For simply creating new containers leave the DeleteUnmatched input at the default valueNone.
Data Input
This is the table being fed into Data in the first module:
| Name | FirstName | MiddleName | LastName | Sex | DOB | Citizenship | Occupation | PolicyOwnerType |
|---|---|---|---|---|---|---|---|---|
| Application 1 | Alice | A | Andrews | Female | 10/10/1985 | Yes | Student | Individual |
| Application 2 | Bob | Bennett | Male | 1980-01-01 | true | Homemaker | Trust to be Established | |
| Application 3 | Charlie | Charles | Male | May 15, 1965 | No | Retired | Existing Trust |
The column names are all names of fields in the DataPortal. Note, however, that they are not all directly defined on the Application container. Most are defined on separate containers linked to Application via the Page control type. Because these are in a one to one relationship with Application, the DataPortal sync module treats them identically to fields defined directly on Application.
The values in this table will be written to the DataPortal in the appropriate fields when this module is run. Because there are three rows, three Application entries will be created. Any fields not included in this table will be left with their default value (which is usually no value). If there were any additional columns in this table that didn't map to any field on Application or one of it's pages, those values would be ignored.
Finally note the types of information present in the table. In general, the DataPortal sync module will try to convert whatever values it receives into the appropriate format for the DataPortal field being written to. In this case, because this data is coming from a Table Editor module, all the raw values are simply text; conversions will also work with differently typed data from other sources.
- For Text controls like
FirstName, the value to be stored will simply be the string. - For Category controls like
SexandOccupation, the values in the table match the picklist values (case-insensitive); if a value doesn't match one of the options no value will be set and an error will be included in the Errors output. - For Multi-Select Categories the values in the table should be comma separated picklist values (case-insensitive). For example, if
Occupationwas a multi-select category (change the type from:Form.Occupation->[Form.Occupation]), you can select 'Student' and 'Unemployed' at the same time by using "Student,Unemployed". Note that the order of the comma separated values does not matter. - For CheckBox controls like the
Citizenshipfield, the DataPortal stores a Boolean value (trueorfalse). This can be expressed in a variety of ways in the input table, we useYes,No, andtruefor the values here; the strings0,1,N, andYalso work, as will a variety of non-string values. - For Date controls the input will be parsed as a date; a wide variety of formats are possible.
Updating Existing Containers
The second DataPortal Sync module demonstrates one way to update existing containers, while also inserting a new instance at the same time.
To see the results of this module, disable the Dependency Waiter the Counts output connects to and run the DataFlow. Go back to the DataPortal.
The DataPortal will now have four applications, and if you enter the Alice Andrews application you'll see that the MiddleName field on the Proposed Insured tab is now Alexis rather than A.
The inputs FormId, Application, and ParentInstanceId are all the same here as above. JoinColumns and DeleteUnmatched have been set to their default values, rather than the special values they needed above to facilitate a clean demo environment.
The AppendInstanceIds output has been unchecked, which for this module means that the final output, Table, is not set (and any modules connected to it would not execute). Note, however, that the Table output of the first DataPortal Sync module is used in the construction of the Data input table for this module. Here is that table:
| InstanceId | Name | FirstName | MiddleName | LastName | Sex | Occupation |
|---|---|---|---|---|---|---|
| Application 4 | Doris | Davidson | Female | Employed | ||
| 31 | Application 1 | Alice | Alexis | Andrews | Female | Student |
Most of this table is similar to the previous Data table. The InstanceId column is new, and is being used to identify existing containers to update rather than creating new containers. Thus the second row will update the existing instance, changing the MiddleName from A to Alexis. Because the first row doesn't have an InstanceId value, a new entry will be created for it.
The InstanceId value is the ID of the Application to map into. When you're looking at the DataPortal you can find it in the URL:
... /DataPortal.aspx#/form/1662747/AppManagement/1/Applications/31
In this DataFlow, however, we instead got the InstanceId from the Table output of the first DataPortal Sync. That output looks like this:
| InstanceId | Name | FirstName | MiddleName | LastName | Sex | DOB | Citizenship | Occupation | PolicyOwnerType |
|---|---|---|---|---|---|---|---|---|---|
| 31 | Application 1 | Alice | A | Andrews | Female | 10/10/1985 | Yes | Student | Individual |
| 32 | Application 2 | Bob | Bennett | Male | 1980-01-01 | true | Homemaker | Trust to be Established | |
| 33 | Application 3 | Charlie | Charles | Male | May 15, 1965 | No | Retired | Existing Trust |
This is simply the input table Data with a new InstanceId column appended. Each value in that column is the correct ID for the container created (or updated) by that row of the table. Thus to create our new input table we simply modified this output table. Of course, it is somewhat unnatural to create and then immediately edit the same values of an entry; this InstanceId column is often more useful when creating child containers.
Update and Delete Existing Containers
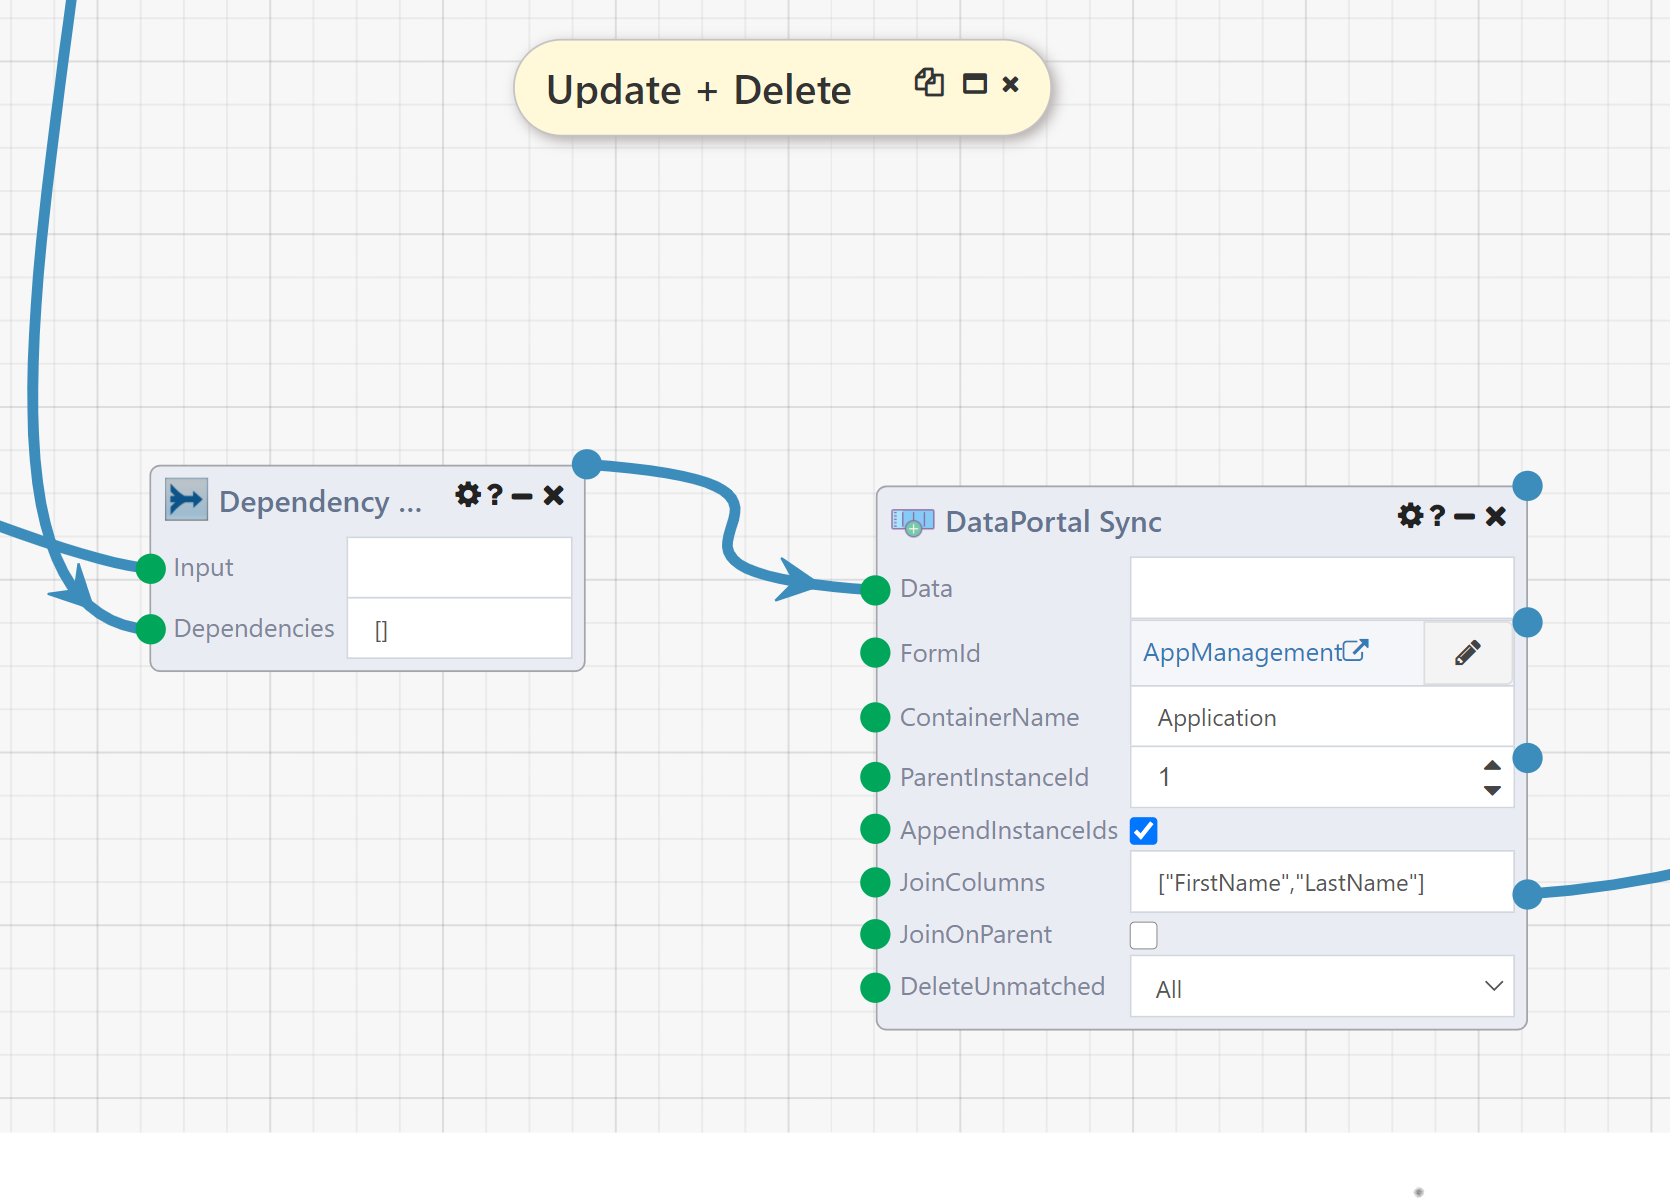
The next DataPortal Sync module shows another way to update existing containers and a way to delete existing containers.
To see the behavior of this module, disable the Table Query module immediately downstream and run the DataFlow. When you go back the DataPortal, there will once again be only three Application entries, and the Alice Andrews entry will have A as the MiddleName. Thus this module has undone the modifications above.
The key inputs here are JoinColumns and DeleteUnmatched. All of the other inputs, including Data, are identical to the first DataPortal Sync module, defining the values to be created.
JoinColumns defines an alternate way to identify existing containers using columns of Data. Its value must be a list of column names. The values in those columns are then compared to existing containers, with three possible outcomes:
- If no existing container matches on all join columns, a new container is created. Note that this is what happened on the first run of the first DataPortal Sync module, so the behavior was the same as it would be with no value for that input
- If exactly one existing container matches on all join columns, that container is updated with the values from Data.
- If more than one existing container matches on all join columns, the module fails. Thus the join columns should uniquely identify entries in the DataPortal; it is often a good idea to have a CustomIndex enforcing that uniqueness on columns you intend to use as JoinColumns.
DeleteUnmatched allows you to delete any containers that aren't part of the current sync. The All option selected here means that any containers not included in Data will be deleted. This allows for a true "sync" behavior where the data in the DataPortal exactly matches the input data after the sync. None does no deletion and is usually the desired behavior. The MatchedParents option is discussed below.
Create Child Containers
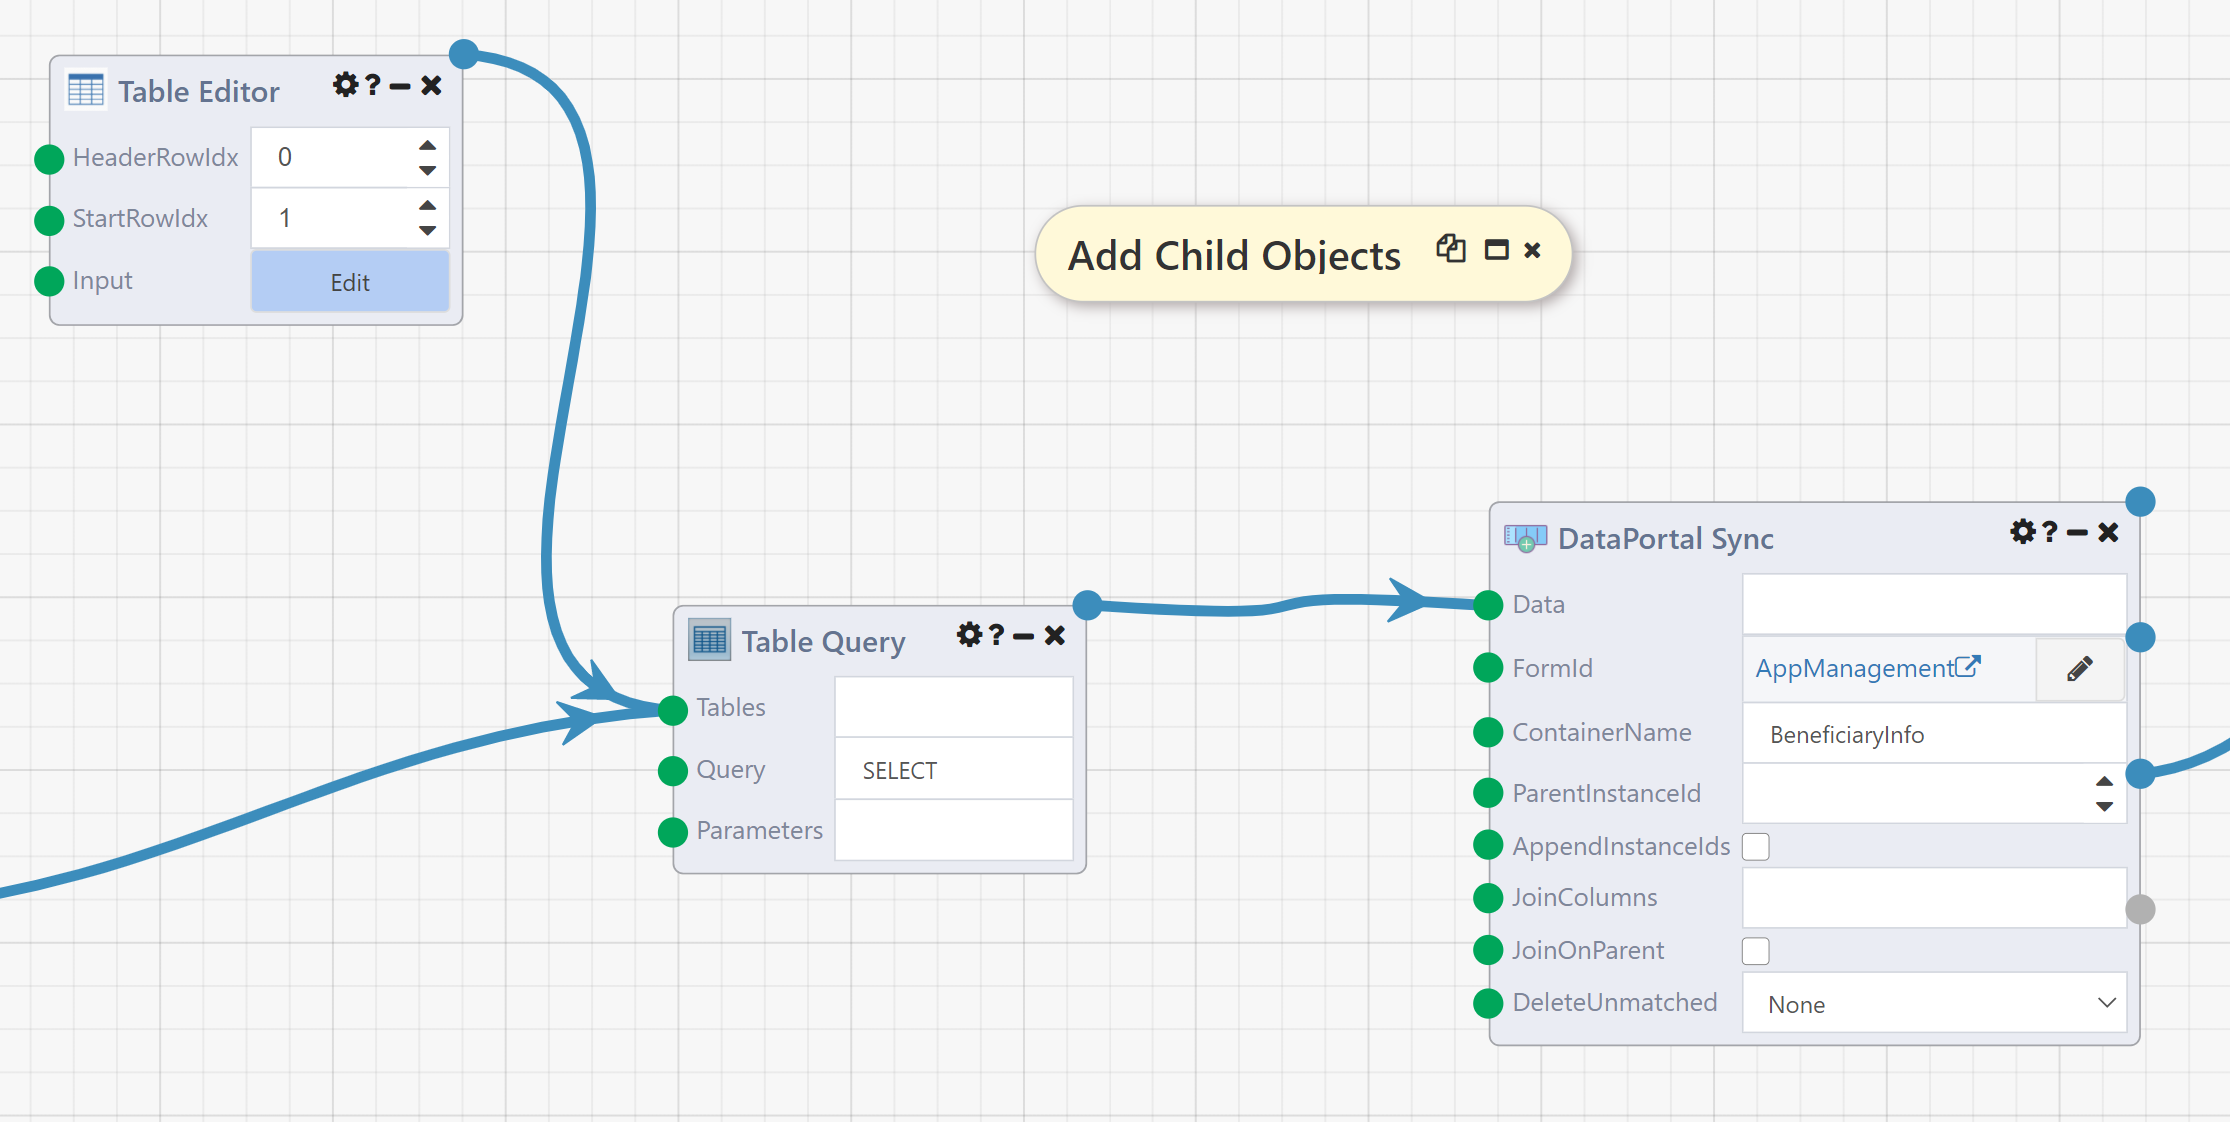
The next, and final, DataPortal Sync module in this example DataFlow demonstrates how to create containers that live inside other containers.
To see the effects of this module, disable the dependency waiter downstream of it and run the DataFlow. In the DataPortal, navigate to the Charlie Charles application and open the Beneficiary Information tab. The Beneficiary Information table should now have two entries:
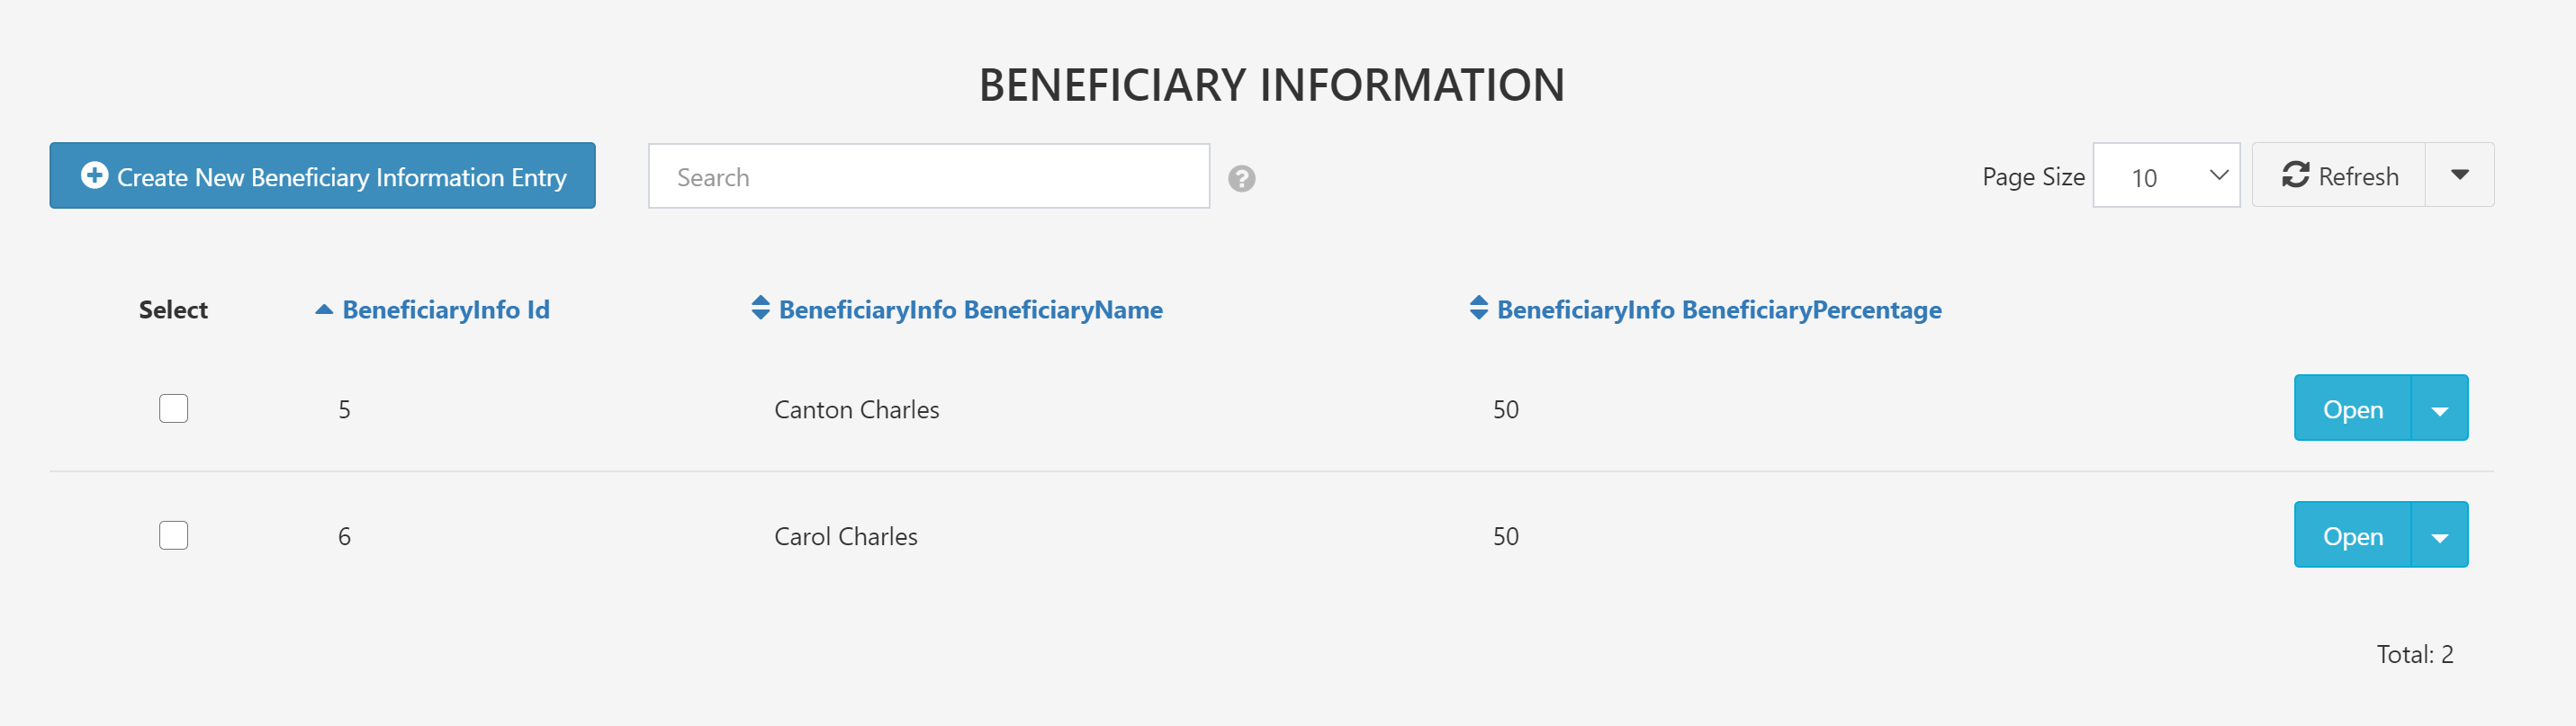
If you go to the same place in the Alice Andrews application you'll find one entry in the table.
Returning to the DataFlow, there are two key inputs to notice on this DataPortal Sync module. The first is ContainerName, which is now BeneficiaryInfo indicating that we are now intending to work with BeneficiaryInfo containers rather than Application containers.
The other is ParentInstanceId, which is now empty. This signals to the module that we will be providing the necessary parent ID in the Data table. Here is that table:
| ParentInstanceId | ApplicationFirstName | BeneficiaryName | BeneficiaryPercentage | BenficiaryRelationship |
|---|---|---|---|---|
| 31 | Alice | Andrew Anderson | 100 | Individual |
| 33 | Charlie | Canton Charles | 50 | Individual |
| 33 | Charlie | Carol Charles | 50 | Individual |
Note the ParentInstanceId column. The values in this column are InstanceId values for SectionC instances, where SectionC is the Page under Application that contains a Table of BeneficiaryInfo entries. Thus the "Parent" of each BeneficiaryInfo is the SectionC instance we want to write to. Because SectionC is in a one to one correspondance with Application, in this small demo example the instance ID of SectionC will match the ID of Application, so in this case we have retrieved them from a previous run of DataPortal Sync on Application. This identity is not guaranteed to hold in general, and you should always use the ID of the direct parent as the ParentInstanceId.
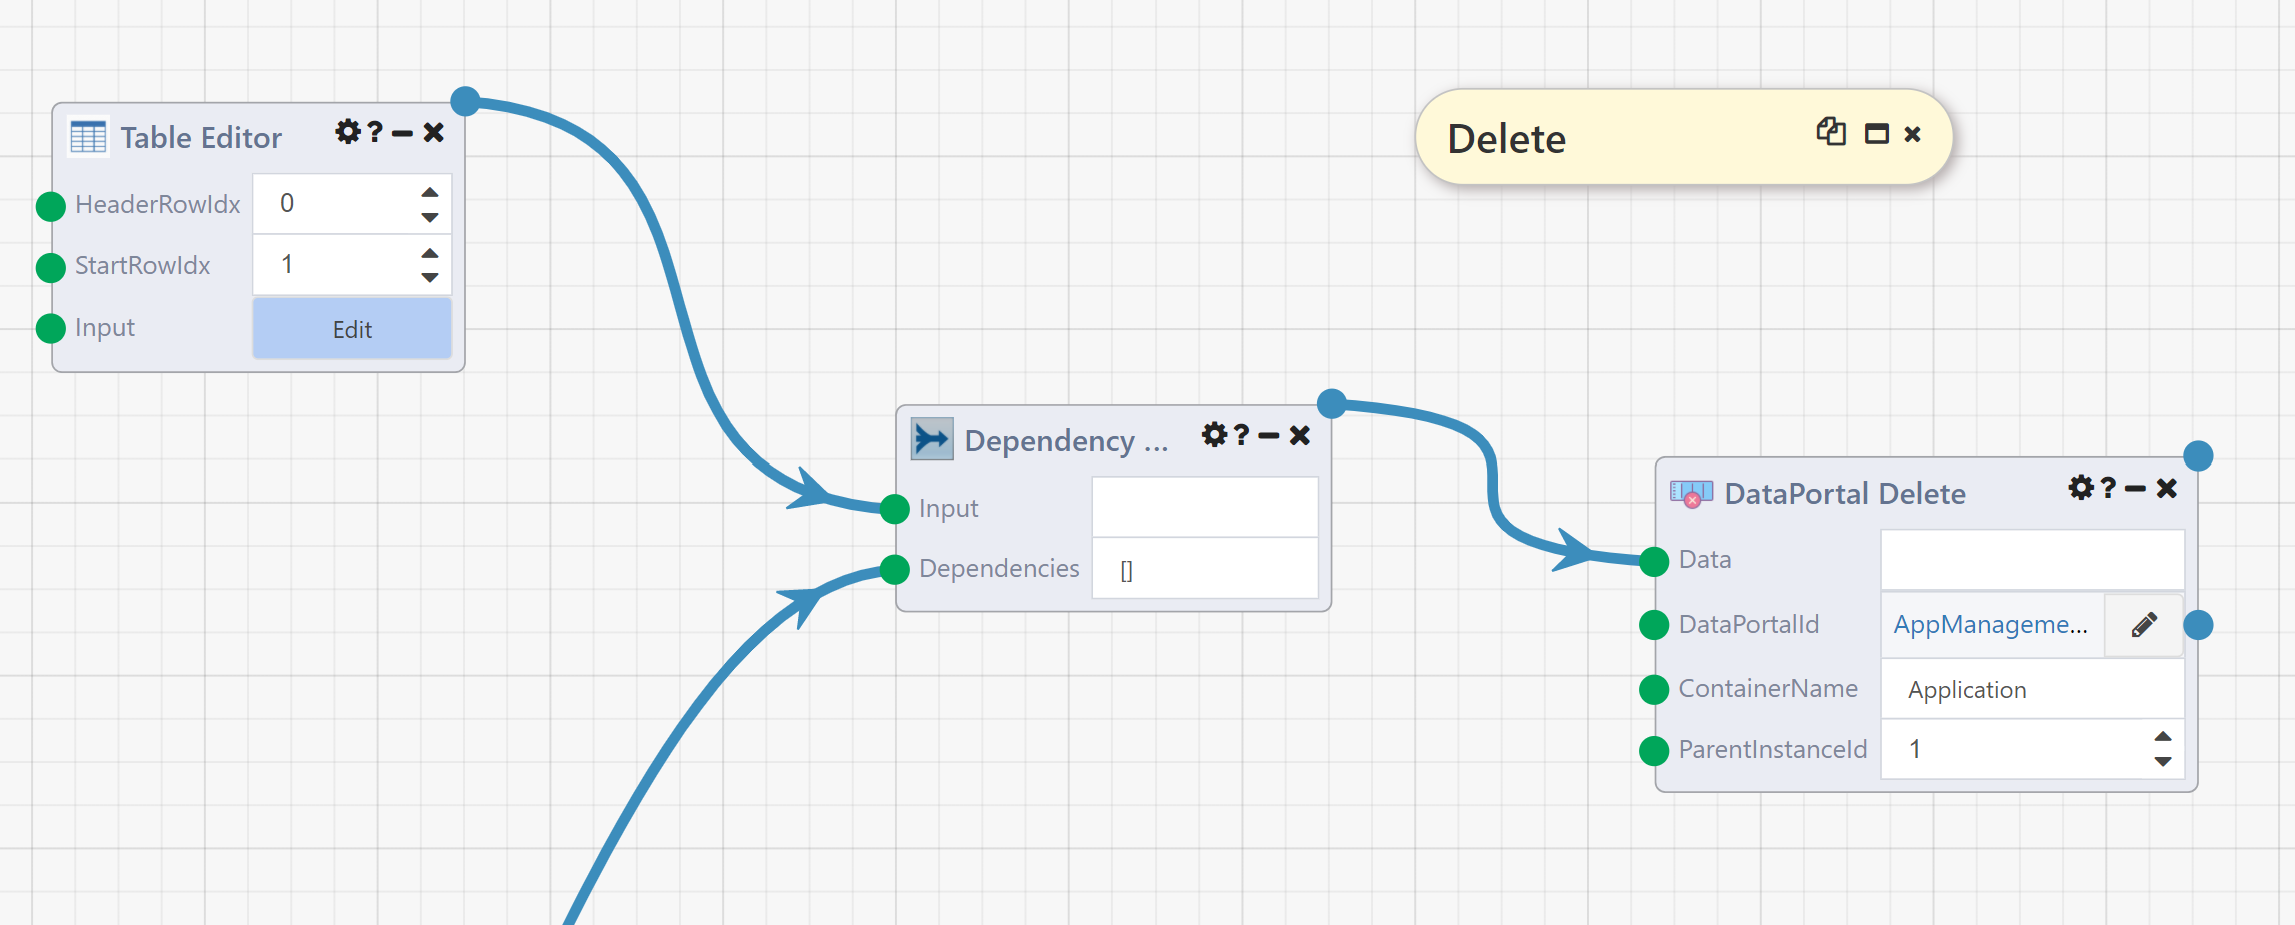
DataPortal Delete
The final module in this example DataFlow is a DataPortal Delete module; a close relative of the DataPortal Sync module.
To see the impact of this module, enable all modules and run the full DataFlow. When you go to the DataPortal, there should be two Application entries, those for Alice Andrews and Charlie Charles. The entry for Bob Bennett has been deleted.
The DataPortal Delete module has many of the same inputs as the DataPortal Sync module, but uses them to identify existing containers to delete rather than creating or updating containers. The DataPortalId input behaves the same as the FormId input on DataPortal Sync, and ContainerName has the same meaning.
In this case, we have submitted the following table for Data:
| FirstName | LastName |
|---|---|
| Bob | Bennett |
This one row table will result in one Application entry being deleted. Because we have chosen to include columns corresponding to fields on Application or its Page containers, this Data table is treated as containing join columns. Every column in the table is used to join to the existing data, in this case finding the entry with FirstName Bob and LastName Bennett. Because ParentInstanceId is set this search is also limited to those with parent ID 1, but all Application entries have parent 1 because they are at the top level of the DataPortal (underneath only the singleton AppContainer). We could also have included a ParentInstanceId column in the table to limit the join to different parents on each row. Finally, we could have instead identified the containers to delete by InstanceId as the only column in Data.
Input Details
Data
This is your input table, containing the data to sync into your DataPortal and optionally including information to use to identify existing data to update.
Most column headers should be the exact name of a field in the container or one of its Page children. For example, suppose your DataPortal's container has a field defined as such:
| Name | DisplayName | Description | Type | ControlType |
|---|---|---|---|---|
| FirstName | First Name | System.String | Text |
Then, the name of your field is FirstName.
Columns whose name is a DataPortal field have two potential purposes:
- Data to be mapped. This is the more common usage, in which the values that should be written into a particular field are included in the column. This applies whether a new container is being created or an existing container is being updated
- Join columns. It is also possible to use data on fields to identify existing columns. See JoinColumns for details.
There are two other columns that may optionally be included in Data:
InstanceId- This column allows you to directly identify an existing container by ID. Find the correct ID in the DataPortal URL when looking at the container to be mapped:
... /DataPortal.aspx#/form/2340034/SurveyManager/1/Survey/324
ParentInstanceId- This column allows you to identify which parent container each row should be mapped under. This is usually the parent under which a new instance will be created, though it can also be used to restrict the identification of an existing container (see JoinColumns).
Join columns, InstanceId, and ParentInstanceId will be used to determine which container, existing or new, to write data to. The data in all other columns will be stored to the identified container. If a column does not match a field on the container that column will be ignored.
There is no need to worry about exact type matching — the module will automatically attempt to convert the data provided in the table to the appropriate type in the container's underlying database. Category fields should be entered as the string value in the table, rather than the integer ID.
FormId
This is the ID of the DataPortal you'll be mapping into. Usually this will be filled in automatically when you select the DataPortal by clicking the pencil icon on the input.
If you need to set it manually (for example over a connection), you can find it in the URL when you're viewing your DataPortal on the web, in the bolded section below:
... /DataPortal.aspx#/form/2340034/SurveyManager/1/Survey/324
ContainerName
This is the name of the container that the module will be creating instances of and attempting to map values into. You can find it in your DataPortal's Excel template as we did for the field names, or from the page URL when viewing an instance of the container in question:
... /DataPortal.aspx#/form/2340034/SurveyManager/1/Survey/324
Note that data may be written to containers with different names if they are Page children of the given container name.
ParentInstanceId
The container to be created/mapped into might exist inside another multi-instance container. Therefore, you must specify exactly which parent holds all of the new instances of your container or will hold them after they are created. You can find it in the URL just before the name of your container:
... /DataPortal.aspx#/form/2340034/SurveyManager/1/Survey/324
You can also choose to leave this input blank and instead include ParentInstanceId as a column in the Data table. In this case each row will be mapped under the corresponding parent instance, allowing instances under multiple parents to be mapped with a single input table. If the ParentInstanceId column is blank for any row that does not contain an InstanceId value or join columns identifying a single existing container the module will fail. That is, if all rows of Data refer to existing containers by InstanceId or join columns then ParentInstanceId need not be set, but if any row of Data should create a new container, then ParentInstanceId must be provided either as a column or as this input.
AppendInstanceIds
Optionally return a copy of the input Data table with a column InstanceId holding the IDs of every mapped container. All other columns will be preserved, whether they were mapped or not. If InstanceId was already a column in Data, the column will be updated with the IDs of the mapped containers.
JoinColumns
A list of names of columns in Data that will be used to identify existing container instances. For each row in the table, if an instance exists with the same values as the row for every join column then that row's other values will be mapped into the identified instance. As with general mapped values, there is no need to worry about exact type matching.
Matching on join column will be scoped down by ParentInstanceId if the JoinOnParent input is checked. This includes ParentInstanceId either as a module input or as a column in the table. Otherwise the match will be performed across all containers regardless of parent.
If no matching instance is found a new instance will be created. If multiple matching instances are found, the module will fail. If Data contains multiple rows with the same values in the join columns the matching container will receive the values from each row in order, thus ending up with the values from the last matching row.
If Data contains an InstanceId column, the value in that column will be used rather than the join columns, but join columns will be considered for any row without a provided instance ID.
JoinOnParent
Include the parent in the join columns. If join columns are not set this option is ignored. If they are set, checking this option will limit matches by ParentInstanceId, whether that is defined as a column in Data or as an input. Without this option parent will be ignored and only the values of the listed join columns will be considered in matching to containers.
DeleteUnmatched
Choose a setting to define what containers the module should delete, if any. The options are:
None: No containers will be deleted (default)MatchedParents: Containers will be deleted if they are not synced and live underneath a parent that had some containers synced.All: Containers will be deleted if they are not synced, regardless of their parent.
This option can be used to achieve syncing behavior between the source Data table and the set of containers in the DataPortal. That is, if set to MatchedParents, after running this module the containers under the matched parents will exactly correspond to those defined by Data. If set to All, the containers for the entire table will correspond to those defined by Data.
Output Details
Result
The module outputs a ContainerReference object corresponding to the last container created during the execution. This is the container that was created or identified and filled in for the last row of your source table.
After execution, however, you should expect to see one new instance of the named container created inside the parent instance for each row of the source data table. Those container instances should also contain the values for each field (each column) of the table. If you don't see values in one of the fields you were attempting to fill in, check that you properly specified the name of that field in the column header above those values in your table. Beyond that, ensure that the type of that column in the table is as close to the correct data type as possible, to ensure mapping occurs successfully.
Errors
A list of any errors that occured during the mapping of properties. These can be any kind of "safe" error that doesn't prevent further processing, such as a table value of an incompatible type with the destination field.
Counts
A dictionary containing counts for the number of records inserted, updated, and deleted along with the total number of records processed. You can use this to verify that rows expected to update existing container instances were correctly processed as updates and those expected to create new containers did so.
Table
A copy of the input table Data with a complete InstanceId column containing the IDs of every mapped instance. If InstanceId was already a column it is updated with the IDs used during mapping. All columns of Data are preserved even if they were not mapped. If the input AppendInstanceIds is false, this output will not be set.